
How to crawl websites using Cloudflare with the Googlebot user-agent
If you crawl your website with a regular JetOctopus user agent, it will not be blocked by Cloudflare. However, if you want to check how your site is seen by Google bot using crawling, Cloudflare will block unconfirmed Googlebot.
We remind you that you can crawl your website with the Googlebot Mobile or Googlebot Desktop user-agent. To do this, select the user agent type in “Basic settings”.
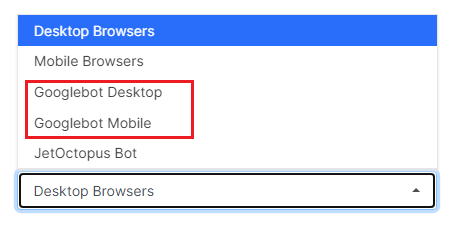
Cloudflare has powerful protection for mitigating bot traffic, so when crawling using a Googlebot user agent with an unconfirmed IP, the crawler will be blocked. The crawler will receive a 403 response code.
Cloudflare will perceive the crawler as a fake bot because the crawler’s IP will not match the original IP address of the Googlebot.
How to add an exception to Cloudflare
Go to your Cloudflare account, and select the desired website from the list. Then select “Bots” in the “Security” menu. On the “Bot Report” chart, go to the “Configure Super Bot Fight Mode” menu.
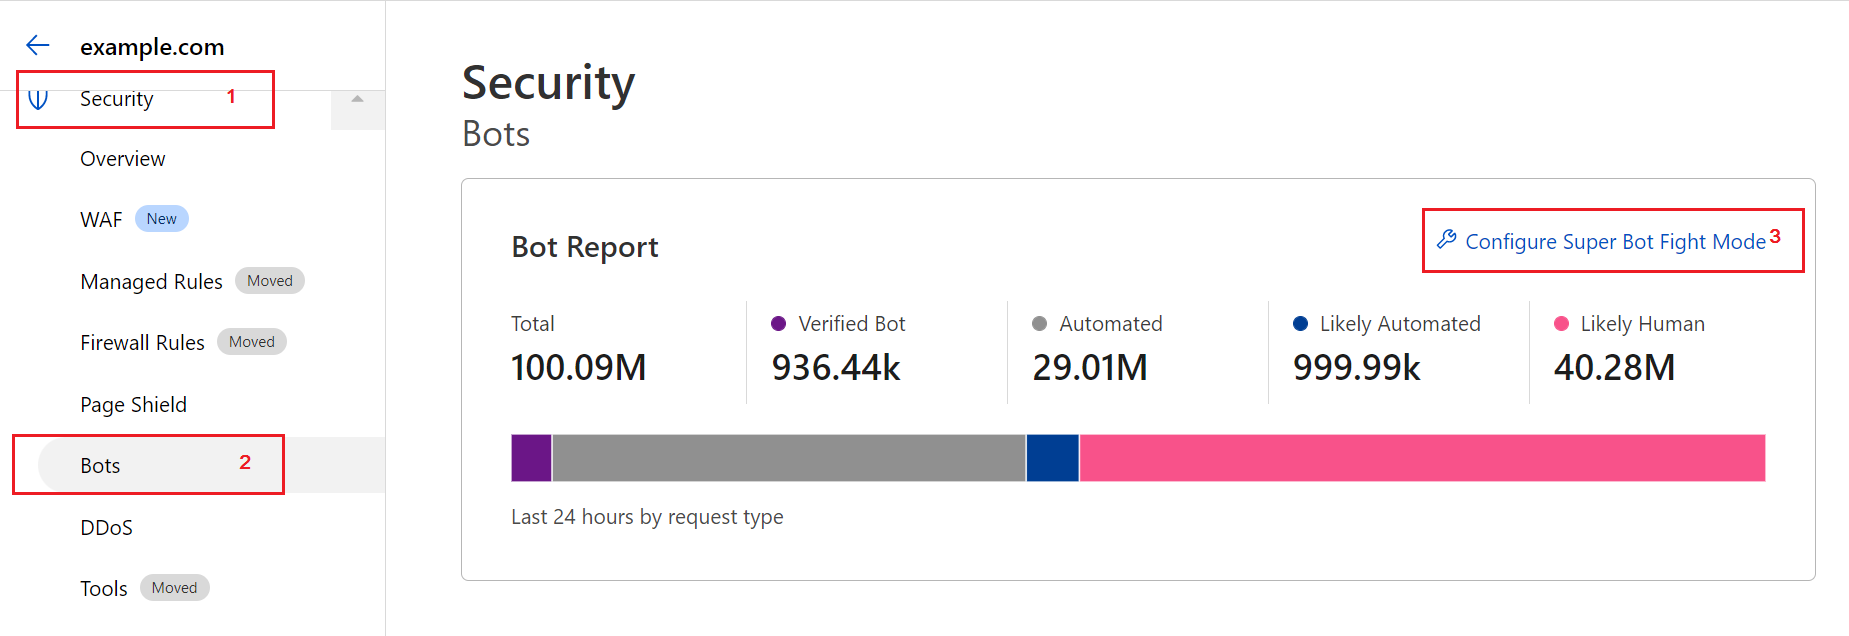
The setting depends on your Cloudflare subscription:
- if you use a free plan, turn off the “Bot Fight Mode” option;
- if you use the Pro plan, allow “Definitely automated” and “Verified bots”, and “JavaScript Detections” must be disabled;
- if you use a Business or Enterprise plan, make the same settings as for the Pro plan. Additionally, allow “Likely automated”. “Static resource protection” must be disabled.
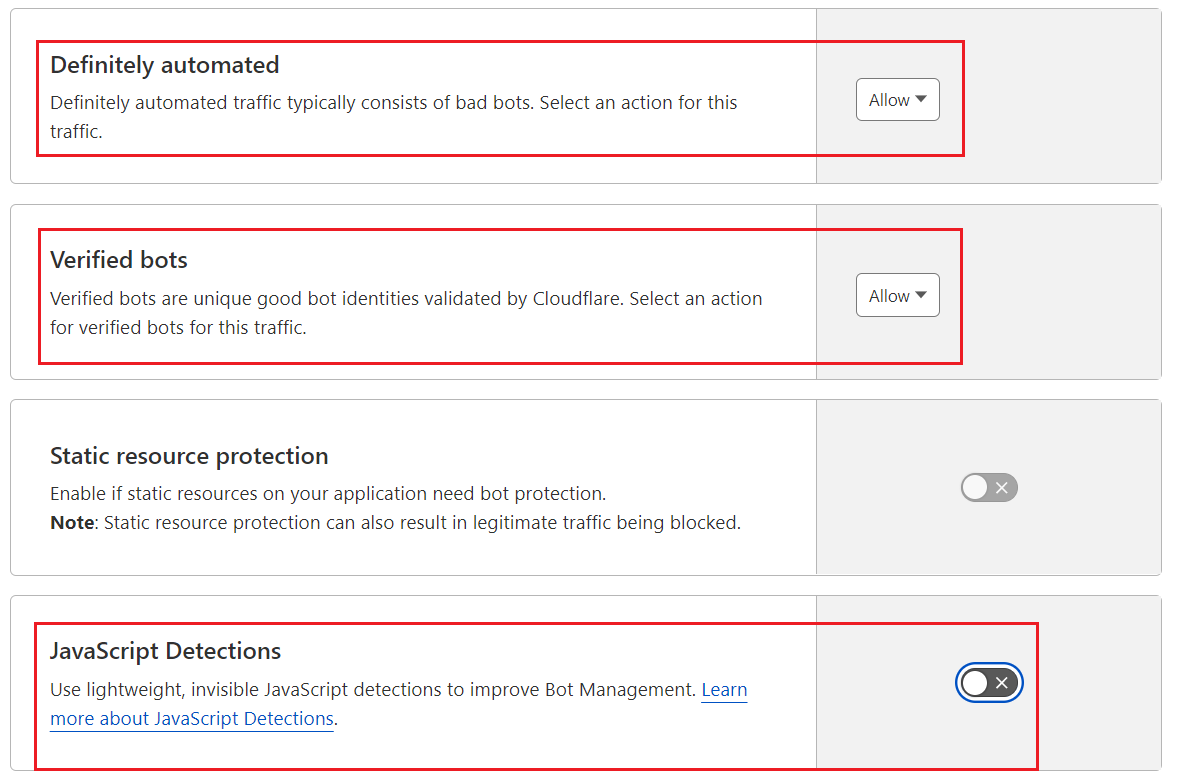
After these settings, you can start crawling with JetOctopus using the Googlebot user agent.
After the crawl is finished be sure to reset all Cloudflare settings to ensure strong protection from fake bots.
How to add exceptions by IP address
You can also add a list of exceptions by IP address. To do this, select the desired site from the list in Cloudflare. Next, go to the “Security” menu and select “WAF (Web Application Firewall)”. Click “Create firewall rule” to add a list of IPs that Cloudflare should not block.

Select “IP Source Address” from the drop-down filter, select “equals “ and enter JetOctopus IP-s:
54.36.123.8
54.36.123.8
54.38.81.9
147.135.5.64
139.99.131.40
198.244.200.110
Needs to select the “OR” directive between IP addresses.
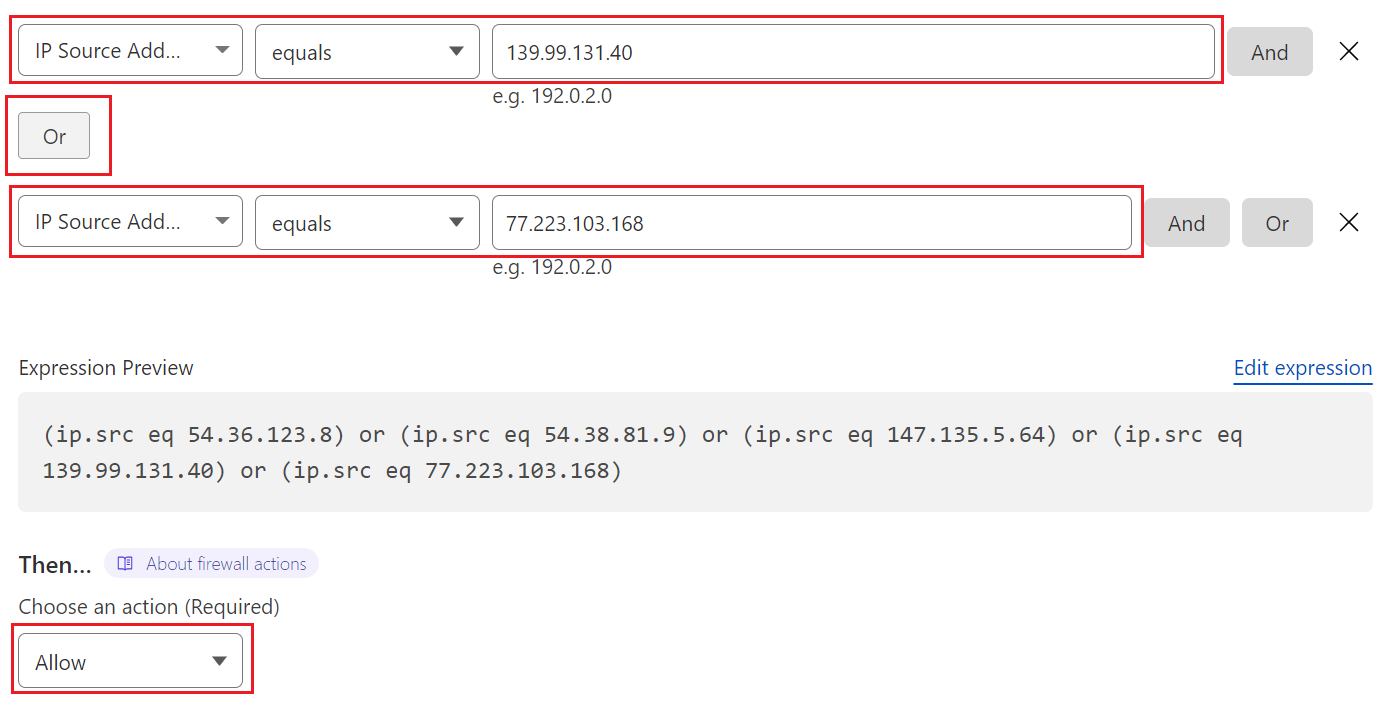
Click “Allow” and save the rule.

